Top 5 Maintenance Tips for Heat Exchanger Parts

Fouling of a heat exchanger increases operation costs and reduces reliability. A simple maintenance schedule is the best way to prevent fouling.
Conduct a visual inspection to check for loose connections and other leakage-related problems. This can also help to identify any abnormal operating conditions.
Contents
Toggle1. Clean and Lubricate
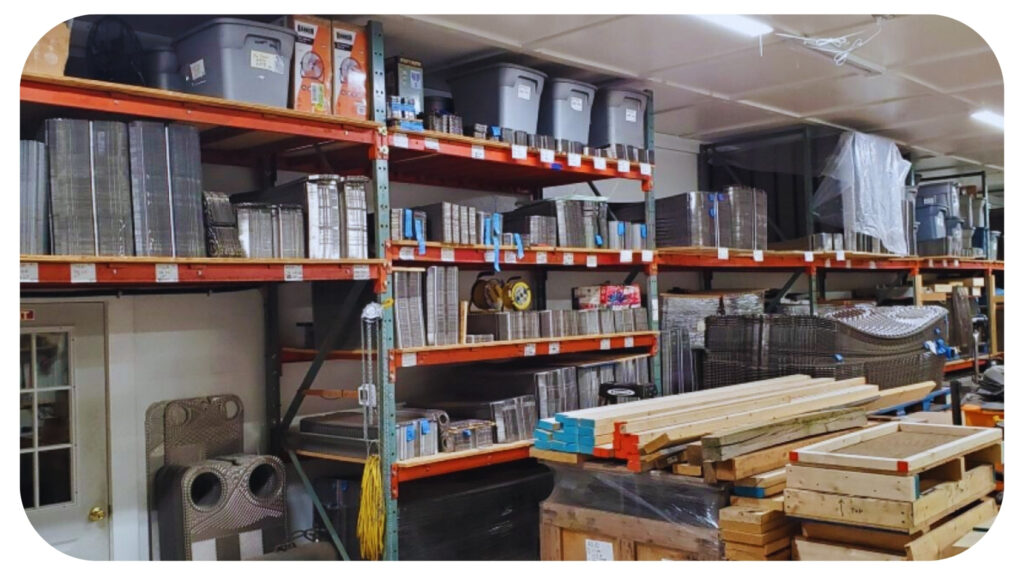
Cleaning is vital for preventing leaks. This can include removing scale and deposits from the tubes, headers, and access points. Ensuring the heat exchanger parts for sale (http://www.northroad-hx.com/plates-gaskets) are installed correctly and tightened to the manufacturer’s specifications is also important.
Fouling and corrosion can reduce the performance of your heat exchanger. Both can cause blockages and limit your system’s ability to transfer fluid.
Cleaning can also help prevent corrosion. You can do this by following the CIP procedures for your particular plate heat exchanger model. Using an acid CIP optimized for your unit’s specific duties is important. It would help to lubricate the carrying and guiding bars to facilitate opening, closing, and adjusting.
2. Check for Leaks
A leaking heat exchanger can create product contamination and hold up production. You can check for leaks by visual inspection or performing a pressure test. This can be done using water, air, or another suitable fluid. You can also use a spine tester to determine the condition of the tubes and, if any, need retubing.
Regular maintenance on your wide-flow channel plate heat exchanger helps prevent problems like corrosion and leaks that can impact performance. You can also monitor the flow rates of each passage to ensure they are evenly distributed. This way, you can catch issues that could cause material buildup or leaks and avoid costly repairs in the future.
Additionally, you can ensure your gaskets are properly installed and lubricated for easy opening and closing.
3. Check for Corrosion
Corrosion in tubular heat exchangers can damage the unit and compromise product quality. This is especially true if the unit leaks.
Localized pitting corrosion can occur in ferrous and nonferrous metals due to the electrochemical potential between oxygen-starved pits and the unprotected metallic surface acting as the cathode. This causes cross-contamination between process fluids.
Galvanic corrosion (https://www.azom.com/news.aspx?newsID=57833) occurs when different metals in an electrolyte are coupled, resulting in the preferential corrosion of the less noble metal. This can result in severe damage.
Visual inspections are crucial to identify corrosion issues. In addition, performing regular pressure testing can identify leakage problems. Once a leak has been addressed, testing can be used to verify that the repair has been successful and that the unit is operating correctly.
4. Check for Damage
Heat exchangers can be subject to various kinds of damage. Erosion wears down the metal surface, leading to thinning and eventual leaks. Corrosion corrodes the metals and leaves residues that clog the tubes. These issues can lead to a cracked exchanger, which allows toxic flue gas and deadly carbon monoxide to enter the house.
Physical internal and external checks can help prevent these problems. For example, ensuring proper tube-to-plate sheet clearances prevents bypassing and helps ensure efficient thermal leakage. Similarly, checking for poor seals or gaskets can also prevent proper heat transfer.
Finally, ensuring your employees follow plant policy for wearing protection and using chemical cleaning agents can reduce the chance of damage to the plates and other components. Also, ensuring they test and verify the performance of the equipment before returning it to service will help them spot and repair any residual problems.
5. Check for Defects
The best way to reduce maintenance downtime is by preventing mechanical problems before they occur. To do so, regularly check the performance of the heat exchanger and monitor for any deviations in temperature, pressure, or energy consumption.
Corrosion: Look for signs of corrosion, particularly around joints, seams, and bends. Implement a preventive corrosion management strategy that includes cleaning, chemical treatment, and inspection of components.
Fouling: Clean the tubes regularly to remove mineral deposits and other contaminants obstructing flow and reducing performance. Also, ensure the tube-to-tube sheet clearances are adequate to avoid bypassing and thermal leakage.
Inspect difficult-to-access areas with a remote visual inspection device like a video scope, which provides an immediate view of any issues. The device can even identify potential defects before they cause serious damage to the tube bundle.
Recommended For You
Five Questions to Ask a Home Care Agency
Most Inside
Most Inside offers high-quality recommendations and valuable updates to enhance all aspects of your life, providing premium guidance and enriching experiences.


